7 Tips for Choosing a Solar Power System for RV
Choosing a Solar Power System For Rv can feel simple until the first night without a campsite hookup. A refrigerator clicks on, phones need charging, lights run longer, and the battery monitor drops faster than expected. The right system should match your real travel habits, not only the wattage printed on a product box. Will Prowse, a respected mobile-solar educator and author, offers a useful reminder: “Your energy needs come first.” That principle shapes every reliable RV solar decision.
These seven tips examine daily power use, panel capacity, battery chemistry, inverter size, charging speed, installation limits, and future expansion. A small weekend trailer may need a different setup from a full-time motorhome with a laptop, induction cooker, and medical equipment. Measure actual consumption when possible. Guessing is tempting. It is also where many purchases go wrong.
Look closely at roof shadows, cable distances, ventilation, and battery placement. A panel can advertise impressive output, yet produce much less under tree cover or winter clouds. A powerful inverter may operate a coffee maker, but it can also drain a modest battery quickly. Safety matters too. Secure mounting, correct fuses, suitable wire sizes, and professional review can prevent expensive failures. Local rules and manufacturer instructions should guide the installation.
There is no perfect system. Even experienced owners revise their plans after one long trip. Use these recommendations as a practical starting point, then compare them with your measured loads, climate, budget, and travel style. The best Solar Power System For Rv is not necessarily the largest one. It is the system that performs predictably when comfort depends on it.
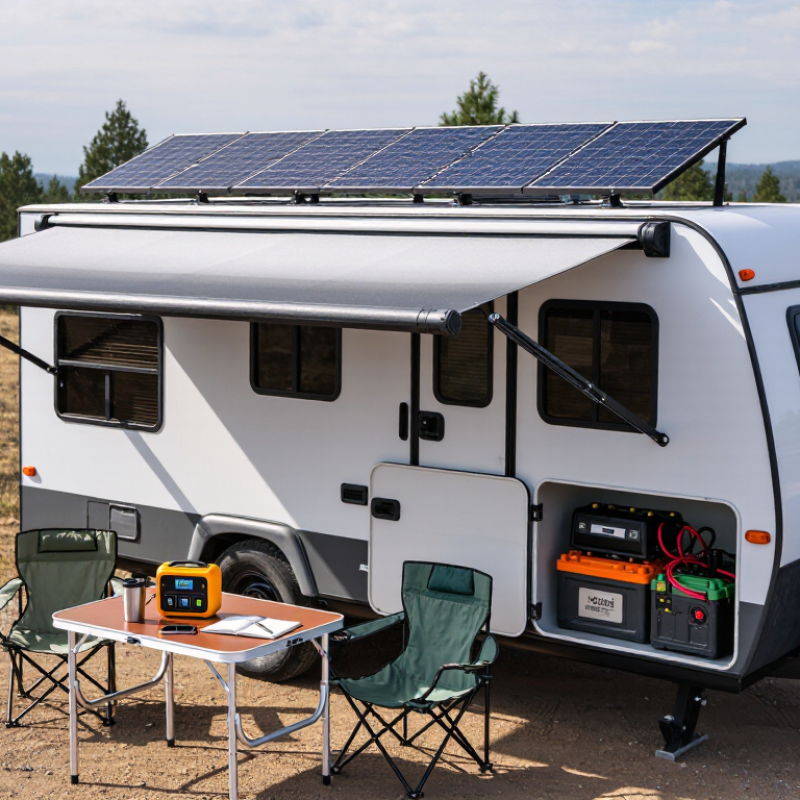
Assess Your RV’s Energy Needs and Daily Power Consumption
Choosing the right solar power system for an RV starts with measuring real energy use, not guessing from appliance labels. List every load, including lights, water pumps, refrigerators, fans, laptops, and cooking equipment. Record each device’s wattage and daily operating hours. Multiply watts by hours to estimate watt-hours. A 60-watt fan running for five hours uses about 300 watt-hours.
Measure it in practice.
I once underestimated standby power from chargers and control panels. That small error became noticeable after two cloudy days. Use a plug-in energy meter for household-style outlets, and check battery monitors for built-in RV systems.
Note your usage during both travel days and campsite days. Air conditioning and electric heating can consume far more energy than lights, so include them separately. Their demand may require shore power or another approved energy source.
Add roughly 15–25% for inverter losses, wiring, battery charging, and unexpected use. Then compare that total with your expected sunlight. For example, 1,500 daily watt-hours may require more than a 300-watt array when usable sunlight is limited. Battery capacity matters too. A battery should cover nighttime use without being deeply discharged repeatedly. Weather, shade, parking direction, and seasonal sunlight can change the result. My own first estimate was too optimistic, so I would rather size carefully than promise perfect independence.
Choose the Right Solar Panel Type, Size, and Mounting Style
Choosing a solar power system for an RV starts with the panel type. Monocrystalline panels usually provide strong output in limited roof space. Polycrystalline panels can cost less, but they may need more surface area. Flexible panels are light and useful on curved roofs. However, heat, foot traffic, and difficult repairs can shorten their service life. Check the panel’s temperature rating and warranty terms carefully.
Match the system size to real energy use, not optimistic estimates. List daily watt-hours for lights, fans, refrigerators, and charging devices. Add a safety margin of about 20 percent for cloudy weather and conversion losses. A 200-watt array may suit light weekend use, while full-time travel often needs much more. Battery capacity and charge-controller limits must also match the array. Oversizing one part creates wasted money and poor performance.
Mounting style affects reliability as much as panel efficiency. Fixed roof mounts are convenient, but shade from air conditioners can reduce output sharply. Leave service space around each panel. Portable panels allow better positioning beside the RV and make cleaning easier. Tilt mounts can improve winter production, though they require secure locking before driving. Use weather-resistant cable glands and inspect roof seals twice each year. My first estimate ignored morning shadows, so the system produced less than expected. Measure the roof at different times before drilling anything.
Match the Battery Bank and Charge Controller to Your System
Choosing the battery bank and charge controller correctly keeps an RV solar system reliable. Start with measured loads, not guesses. Record refrigerator use, lighting, fans, water pumps, and inverter demand for several days. Multiply daily watt-hours by the number of days you want without strong sunlight. Then account for conversion losses and the battery’s usable discharge limit.
Battery chemistry changes the calculation. A battery rated at 200 amp-hours does not always provide 200 usable amp-hours. Lead-acid batteries generally need a larger reserve, while lithium batteries may offer more usable capacity. However, lithium charging can require temperature protection in cold conditions. Check the battery manufacturer’s charging limits and wiring requirements. It matters.
The controller must handle the solar array’s maximum power and current. For a 400-watt array on a 12-volt system, the charging current may approach 33 amps before losses. Add a safety margin, especially in bright, cool weather. An MPPT controller can improve harvest when panel voltage exceeds battery voltage, but it costs more. Match its voltage range to the array’s open-circuit voltage. Install correctly sized fuses and short, adequately thick cables near the battery.
My first estimate would probably be optimistic if it ignored cloudy mornings and inverter standby draw. That is a useful warning. Recheck the system after installation by comparing expected energy with real battery voltage and daily consumption. Small measurement errors can become expensive upgrades later.
Select an Inverter and Essential Components for Reliable Power
7 Tips for Choosing a Solar Power System for RV
Select an inverter before buying panels. It controls how safely your RV uses stored energy. Choose a pure sine wave inverter for sensitive electronics, chargers, and medical equipment. Its continuous rating should exceed your measured load by about 20–30 percent. Surge capacity matters too. Refrigerators and pumps can briefly demand twice their running power. A field check with a plug-in meter is more reliable than guessing from appliance labels. Keep the inverter close to the battery, using short, correctly sized cables and properly rated fuses.
Match the solar controller to your battery voltage and panel output. MPPT controllers usually harvest more energy during cold mornings and partial shade. Battery capacity should cover overnight loads, not just sunny-day consumption. Lithium systems save weight, but charging limits must match the manufacturer’s specifications. Lead-acid systems need ventilation and more reserve capacity. Do not ignore standby draw. It quietly drains batteries.
NREL’s 2018 photovoltaic degradation study reported a median performance decline of about 0.5 percent annually. Size the array with this gradual loss in mind. The IEA PVPS Trends 2024 report recorded more than 1.6 terawatts of global solar capacity by the end of 2023, showing how widely tested the technology has become. Still, RV conditions are harsher than rooftops. Vibration, heat, dust, and shade change real performance. Add monitoring, secure every connection, and verify grounding against local electrical requirements. Perfect sizing is unlikely. Recheck it after a month of actual travel.
Plan Installation, Maintenance, Safety, and Future Expansion
Choosing an RV solar system starts with an honest energy audit. List daily loads, including lights, refrigeration, fans, water pumps, and charging devices. Measure actual usage with a meter when possible. Guessing often creates an expensive mismatch. Check roof space, shade, panel orientation, and the vehicle’s payload limit before purchasing equipment.
Plan cable routes before installation. Keep cables short, protected, and sized for their expected current. Install suitable fuses near batteries and use weather-resistant connectors. Batteries need firm mounting, ventilation, and protection from extreme temperatures. Follow electrical codes and the equipment instructions. A qualified technician should inspect unfamiliar wiring. One loose connection can cause heat, voltage loss, or failure.
Maintenance is simple but not optional. Inspect terminals every few months, clean dust from panels, and check for cracked seals after heavy rain. Monitor battery voltage and unusual temperature changes. Never work on live circuits, and disconnect charging sources before servicing. Leave spare roof space, conduit capacity, and controller capacity for future panels or batteries. Expansion sounds easy. It rarely is. I would rather install a slightly larger cable now than rebuild a finished interior later. Recheck the design after each upgrade, because added capacity can change fuse ratings, charging limits, and overall weight.