

Why Is My Switch Terminal Not Working?
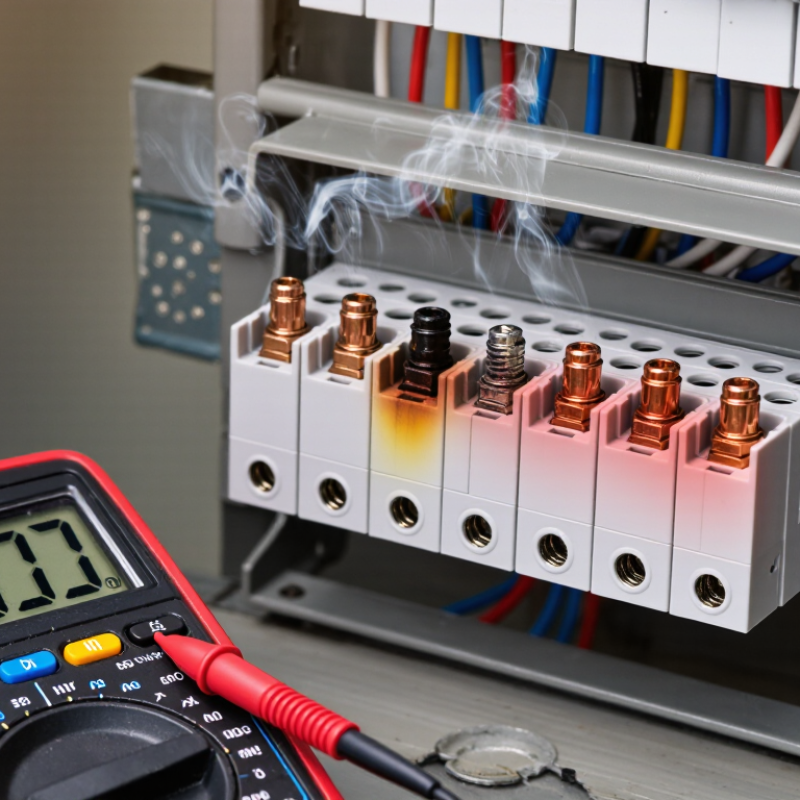
When a Switch Terminal stops working, the failure may begin with a loose screw, oxidized contact, damaged insulation, or excessive heat. The visible symptom is often simple. The cause may not be.
NFPA’s Electrical Fires report recorded approximately 32,650 U.S. home fires involving electrical distribution and lighting equipment from 2015 to 2019. These incidents caused about 470 civilian deaths and 1,100 injuries. The figures do not prove that every failed Switch Terminal is dangerous. They do show why inspection should not rely on appearance alone.
IEC 60947-1 emphasizes suitable construction, temperature limits, insulation performance, and reliable connections for low-voltage switchgear. NFPA 70B also supports documented electrical maintenance rather than occasional troubleshooting. A terminal can look clean while its clamping force has weakened. That detail is easy to miss.
Electrical safety specialist Jim White has repeatedly stressed that “arc flash is a function of the fault current and the clearing time.” His point matters here. A poor terminal connection can create localized resistance, heat, and eventually arcing. The sequence may happen inside a quiet enclosure.
This guide examines why your Switch Terminal may not be working. It covers loose conductors, incorrect wire size, corrosion, overload, faulty switching mechanisms, and measurement errors. It also explains when testing should stop.
Do not guess with energized equipment. A warm terminal, discoloration, buzzing sound, or burning odor deserves immediate attention. Some assumptions may be wrong. The most reliable diagnosis combines visual inspection, manufacturer specifications, torque verification, and properly rated test instruments. Where the evidence remains unclear, a qualified electrician should evaluate the installation before re-energization.
What a Switch Terminal Does and How It Should Work
A switch terminal is the connection point where a wire meets the switch mechanism. It carries current into, or away from, the switching path. In a basic wall switch, one terminal receives the live conductor, while another sends power toward the light. Many switches also include a ground terminal for protection.
When the switch is on, the internal contacts should close firmly. A continuity tester should then show a complete path with very low resistance. When the switch is off, that path should open. The result should be clear: the light receives power in one position and stops in the other. It should not flicker.
A non-working terminal often has a loose wire, a damaged clamp, corrosion, or an incorrect connection. Turn off the circuit at the panel before touching anything, then verify the absence of voltage with a properly rated tester. Never trust the switch position alone. Check that each conductor is secured without exposed copper beyond the terminal. I have seen troubleshooting fail because the tester battery was weak, so test the tester on a known live circuit first, then confirm it is dead again. If the terminal feels hot, smells burned, or shows melted plastic, stop using it. A qualified electrician should inspect it, especially when the wiring is old or unclear.
Why Is My Switch Terminal Not Working?
A switch terminal should provide a continuous electrical path when the switch is closed and block current when it is open. The chart shows typical resistance readings measured across a low-voltage switch terminal.
A healthy closed switch normally measures close to 0 Ω. High resistance can indicate corrosion or a loose terminal, while an open-circuit reading with the switch closed may indicate a broken connection or failed switch.
Common Causes of a Nonworking Switch Terminal
When a switch terminal stops working, the fault is often simple but not always obvious. A loose terminal screw can interrupt current or create dangerous heat. Corrosion increases resistance, especially inside damp wall boxes. A tripped breaker, blown fuse, or damaged supply wire can also imitate a failed switch. The switch may have worn internal contacts. NFPA’s 2022 analysis of 2015–2019 U.S. home fires linked electrical distribution and lighting equipment to about 35,150 fires annually. These fires caused roughly 470 deaths, 1,100 injuries, and 1.3 billion dollars in property damage. Loose connections deserve careful attention.
A practical lesson is that the obvious diagnosis is often wrong. Turn off the circuit, then verify that power is absent with a properly rated tester. Check for darkened insulation, melted plastic, green corrosion, or a conductor that slips from its terminal. A terminal can look tight while the wire sits poorly beneath the screw. Never rely on a switch position as proof of safety. If multiple terminals are dead, inspect the upstream connection and breaker. If heat damage appears, stop testing and contact a qualified electrician. Small mistakes matter here.
Tips: Photograph the wiring before removal. Tighten terminals according to the device instructions, not personal judgment. Do not reuse burned conductors. Test the switch after restoring power, and watch for buzzing, flickering, or warmth. Those symptoms need prompt attention.
How to Inspect the Terminal and Connected Wiring
Why Is My Switch Terminal Not Working?
When a switch terminal stops working, inspect the terminal and connected wiring before replacing the switch. Turn off the circuit breaker, then verify the absence of voltage with a properly rated tester. Do not trust the breaker label alone. Check the terminal screw for looseness, heat discoloration, melted insulation, or a sharp burnt smell. A loose connection may feel stable but still fail under load.
Look closely at the conductor entering the terminal. Copper should be clean, firmly secured, and stripped to the manufacturer’s specified length. Excess bare copper can touch the metal box or another terminal. Gently pull the wire; it should not move. Inspect wire nuts and push-in connections for loose strands. If the switch has multiple terminals, compare the wiring position with the circuit design. A misplaced neutral or open connection can make a good switch appear defective.
NFPA reported an estimated 26,100 U.S. home fires involving electrical distribution and lighting equipment from 2015 to 2019. Those fires caused about 420 deaths, 1,010 injuries, and $1.3 billion in property damage. The report reinforces why small terminal faults deserve careful attention. My first diagnosis is not always right. A failed switch, upstream splice, or broken neutral can produce similar symptoms. Stop if wiring is damaged, crowded, or unclear, and have a qualified electrician test the circuit. Disconnecting power is only part of the inspection. Record each wire before moving it.
Step-by-Step Tests to Identify the Fault
Why Is My Switch Terminal Not Working?
Step-by-Step Tests to Identify the Fault
A dead switch terminal does not always mean the switch has failed. The fault may involve the breaker, wiring, or a loose connection. NFPA’s Home Structure Fires report found electrical distribution and lighting equipment caused about 24,200 U.S. home fires annually from 2016 to 2020. Treat every terminal seriously. Turn off the circuit breaker, then verify the circuit is dead with a two-pole voltage tester. A non-contact tester alone can miss dangerous conditions. Remove the cover plate and inspect for heat marks, melted insulation, loose screws, or copper showing outside the terminal.
Test the circuit methodically. Check whether nearby outlets or lights have also stopped working. Reset the breaker once, but stop if it trips again. With power isolated, use a multimeter’s continuity function across the switch terminals. The reading should change when the switch moves. No change suggests a defective switch. For a three-way switch, identify the common terminal before testing the traveler terminals. Do not guess. I once blamed a worn switch, but a loose upstream connection caused the failure. That mistake reinforced the value of checking the whole circuit.
Tips: Photograph the wiring before removal. Label each conductor. Never tighten terminals while energized. If the terminal is scorched, the wire feels loose, or voltage readings seem inconsistent, call a qualified electrician. The NFPA data shows why small electrical faults deserve careful attention, not rushed repairs.
| Step | Test or Inspection | Expected Result | What an Abnormal Result May Indicate | Recommended Action | Risk |
|---|---|---|---|---|---|
| 1 | Confirm the symptom | The switch operates consistently, or the terminal fails under a repeatable condition. | The issue may be mechanical, electrical, or limited to the connected circuit. | Record whether the terminal is always inactive, intermittently faulty, loose, hot, discolored, or associated with a tripped protective device. | Low |
| 2 | Turn off and isolate the power | The correct circuit is disconnected and cannot be energized during inspection. | Incorrect isolation can leave dangerous voltage present at the terminal. | Switch off the relevant circuit protection, prevent accidental re-energization, and verify isolation with a suitable voltage tester. | High |
| 3 | Inspect the terminal and wiring | Wires are firmly held, insulation is intact, and there are no burn marks, corrosion, cracks, or loose parts. | A loose connection, damaged conductor, overheating, moisture ingress, or a defective terminal mechanism may be present. | Do not use the switch if damage, melting, scorching, or a burning smell is detected. Arrange repair or replacement by a qualified electrician. | Medium |
| 4 | Check the terminal clamp | The conductor remains secure when gently tugged, without excessive movement. | The terminal screw may be loose, stripped, cross-threaded, or unable to grip the conductor correctly. | With power isolated, remake the connection using the correct conductor length and tightening method specified for the device. | High |
| 5 | Test supply voltage | The measured voltage matches the nominal supply for the installation when the circuit is energized. | No voltage may indicate an open circuit, tripped protection, upstream disconnection, or damaged cable. | Trace the circuit from the protective device to the switch. Stop if testing live conductors cannot be performed safely and competently. | High |
| 6 | Test continuity with power off | When the switch is operated, continuity changes between the intended terminals. | No continuity may indicate worn contacts, a broken internal mechanism, or an incorrect terminal connection. | Replace the switch if its internal contacts do not change state correctly. Never perform continuity testing on an energized circuit. | High |
| 7 | Check the connected load | The load operates normally when supplied from a known-good control point or tested independently. | The appliance, lamp, motor, fuse, driver, or downstream cable may be faulty rather than the switch terminal. | Test the load separately using the correct procedure and confirm that its rating is compatible with the switch and circuit. | Medium |
| 8 | Inspect for overload or heat damage | The terminal remains cool during normal operation, with no discoloration or odor. | Excessive current, an undersized conductor, poor contact pressure, or a loose connection may be causing overheating. | Disconnect the circuit and obtain professional assessment. Do not simply tighten the terminal and return a heat-damaged device to service. | High |
| 9 | Verify terminal identification | Line, load, neutral, and earth conductors are connected to the terminals required by the device design. | Misidentification can cause the switch not to control the intended conductor or can create a shock hazard. | Compare the wiring with the device diagram and local wiring requirements. If the arrangement is unclear, stop and consult a qualified electrician. | High |
| 10 | Perform a final functional check | The switch operates smoothly, the load responds correctly, and protective devices remain stable. | Persistent tripping, sparking, noise, heat, or intermittent operation indicates an unresolved fault. | Leave the circuit isolated and arrange professional diagnosis. Do not repeatedly reset a tripped protective device. | High |
Safe Repair or Replacement Options for the Terminal
Why Is My Switch Terminal Not Working?
A failed switch terminal often starts with a small warning: flickering power, a warm faceplate, or a faint buzzing sound. Turn off the circuit at the panel. Then verify that power is absent with a properly rated tester. Never trust the switch position alone.
Remove the cover only if you are qualified to inspect wiring safely. Look for darkened insulation, melted plastic, corrosion, loose screws, or a conductor that has slipped from the terminal. A loose connection may cause heat buildup. Tightening it can help, but it is not always a safe repair. I once underestimated how much hidden heat damage can remain behind clean-looking plastic. If the terminal is cracked, scorched, pitted, or repeatedly fails, replace the complete terminal assembly or switch.
Choose a replacement with the correct voltage, current rating, wire size, and terminal design. Follow the equipment’s service instructions and use a calibrated torque screwdriver when specified. Do not force a larger wire into a small terminal. Do not bridge, bypass, or tape over damaged parts. A licensed electrician should handle uncertain wiring, aluminum conductors, moisture damage, or signs of overheating inside the wall. After repair, the connection should be secure, enclosed, and tested for stable operation. The first test may pass. Keep checking for warmth, noise, or discoloration during normal use.